Designing Your Own Socks: Create Custom Socks with Ease
Vanessa Cromwell
So, you’ve got a killer idea for a pair of custom socks. Awesome. Whether you’re designing for your brand, your beer league softball team, or just for the fun of it, you’re in the right place. Turning that idea from a spark in your brain into a real, wearable piece of art is one of the most satisfying creative projects you can tackle.
This isn’t just for seasoned graphic designers with years of experience. It’s for anyone with a cool concept. We’re going to walk through the entire process together, breaking down everything you need to know to create a professional-level design. Don’t worry about the jargon or technical stuff yet—we’ll get to that.
First Things First: Let’s Talk Terminology
Before you jump into picking colors and drawing patterns, it helps to know the language. Getting a handle on a few key terms will make the entire process smoother, especially when you start working with a manufacturer. Think of this as your cheat sheet for sounding like you know exactly what you’re doing (because you will).
The custom apparel world is exploding, and socks are a surprisingly huge piece of the pie. The global market for custom socks was valued at $137.87 billion and is expected to climb to $174.43 billion by 2033. You can dig into the numbers yourself with this market trends report from Global Growth Insights.
What does that mean for you? It means there’s a massive appetite for unique, personalized socks, and you’re tapping into a trend at the perfect time.
Key Takeaway: The best sock designs are a perfect marriage of creativity and a little technical know-how. Understanding the difference between a knitted and a printed sock, for example, will completely change how you approach your artwork.
To get you started, here’s a quick rundown of the essential terms you’ll see popping up again and again.
Key Sock Design Terminology Explained
This table is your quick reference guide to the lingo. Understanding these terms is crucial for bringing your design to life exactly as you envision it.
Term
What It Means for Your Design
Knit-In (Woven)
Your design is woven directly into the sock’s fabric using colored threads. This is perfect for simpler patterns, bold logos, and stripes with a limited color palette. It gives you a premium, textured, and classic sock feel.
360° Printing
Think of this as a high-tech printer for socks. The design is digitally printed onto the surface of the sock, allowing for unlimited colors, gradients, and even photo-realistic images. It’s the go-to for complex, intricate artwork.
Template
This is your digital blueprint. The manufacturer will provide a file that shows the exact layout of the sock—the cuff, leg, heel, and toe. Your job is to place your design perfectly within the zones marked on this file.
Mockup
This is the exciting part! A mockup is a realistic digital image of what your finished sock will look like. It’s your final chance to check for any mistakes, approve colors, and see your creation come to life before it hits the production line.
Getting familiar with these concepts from the start will save you a ton of headaches later. Now that you’ve got the vocabulary down, you’re ready to start making some creative decisions.
Finding Your Unique Design Direction
Every truly great sock design starts long before you open a design program. It begins with an idea—a clear, compelling concept. This is the soul of your project, where you decide what story your socks are going to tell.
Before anything else, take a step back and ask yourself: What’s the goal here?
Are you designing a bold, in-your-face sock for a sports team? Or are you aiming for something more subtle and minimalist for a corporate event? The vibe you’re chasing will shape every single decision you make from this point forward, from the colors you pick to the patterns you create.
Gather Inspiration and Build a Mood Board
Inspiration is everywhere, but it’s useless if it’s just a jumble of random thoughts. You need to capture and organize it. This is where platforms like Pinterest and Instagram really shine. Fire up a new board and just start saving images that resonate with the aesthetic you’re after.
And don’t limit yourself to just sock designs. Look at everything. Typography on a vintage movie poster, color combinations in a sunset, patterns on an old building—anything that catches your eye.
As you collect these images, you’ll start to notice patterns emerging. This collection, your mood board, becomes your creative north star. It keeps your ideas anchored and gives you something to refer back to whenever you hit a creative wall.
Let’s say you’re going for a “retro summer” theme. Your mood board might look something like this:
Faded ’70s color palettes: Think mustard yellow, avocado green, and burnt orange.
Old-school postcard fonts and sun-bleached imagery.
Classic patterns like chunky stripes or stylized sunbursts.
This process transforms a vague idea like “summer socks” into a solid concept with a real visual identity. It’s a non-negotiable step when you create your own socks and want them to look like they were designed by a pro.
Translate Inspiration Into a Concrete Concept
Okay, mood board assembled. Now it’s time to get practical and break down your inspiration into tangible design elements. This is where you define the core building blocks of your sock.
Start with color. Color is so much more than just decoration; it’s a powerful tool that evokes emotion and sets the entire tone for your design.
When exploring the visual impact of your sock designs, consider how elements like color influence perception. You can learn more about this by understanding color psychology in branding, which can help you make more intentional choices for your project.
Next up, lock in your key motifs. These are the recurring visual elements that will define your pattern. Are you going with clean geometric shapes? A quirky illustration of a cactus? Or maybe just a simple, repeating logo? Pick one or two main motifs and stick with them. Trying to do too much is the fastest way to a cluttered, confusing design.
Finally, think about who’s going to wear these socks. Even if you’re just designing them for yourself, picturing the end user helps sharpen your focus. A design for a wedding party will have a totally different set of rules than one for a weekend hike.
Considering your audience ensures your design isn’t just creative, but perfectly suited for its purpose.
Choosing Your Sock Design Tools and Templates
Okay, you’ve got a solid concept in mind. Now it’s time to bring that idea to life. The tool you pick for designing your own socks is your digital workshop, and the right choice really comes down to your skills, budget, and how complex your design is.
If you’re a seasoned graphic designer, you probably already know your go-to. Professional software like Adobe Illustrator is the industry standard for a reason—it’s perfect for creating those clean, scalable vector logos that look incredible on knit-in socks. For artists who prefer a more hands-on, drawing-focused vibe, Procreate on an iPad is fantastic, especially for detailed illustrations that will be 360° printed.
But what if you’re not a design pro? Don’t sweat it. Many sock companies, including us, have in-house designers ready to help. Plus, there are super user-friendly online tools like Canva or Kittl that offer templates and simple drag-and-drop features, making the whole process way more approachable.
So, What Software Should You Use?
The right software makes your life easier and your final product better. There’s no single “best” option, just the one that’s best for you and your project. Here’s a quick look at the main players.
Sock Design Tool Comparison
Choosing your design software can feel overwhelming, but it boils down to what you need to accomplish. This table breaks down the most popular options to help you decide which one fits your project and skill level.
Tool
Best For
Learning Curve
Cost
Adobe Illustrator
Professionals creating vector graphics, logos, and complex patterns for any sock type.
Steep
Subscription
Procreate
Artists and illustrators who prefer a hands-on, drawing-tablet experience for detailed printed socks.
Moderate
One-time fee
Canva / Kittl
Beginners and those needing quick, simple designs using pre-made elements and templates.
Low
Free & Paid Tiers
Ultimately, a simple design created in a free tool can be just as powerful as a complex one from Adobe, especially if you nail the fundamentals. This is particularly true if your socks are for a promotional event, where a clean, bold logo often beats a busy pattern. You can check out our guide on how to use socks as a promotional item for more on what works best for brands.
Why Manufacturer Templates Are Your Best Friend
Listen up, because this might be the most important part of the entire process. Once you partner with a manufacturer, they will give you a design template. This isn’t a friendly suggestion—it’s the absolute blueprint for your sock, and you must follow it to the letter.
A sock template is typically a flat file (for Illustrator or Photoshop) that maps out the exact dimensions of the cuff, leg, heel, and toe. Critically, it includes “safe zones” and bleed areas.
Crucial Insight: Ignoring the template’s safe zones is the number one rookie mistake. Any part of your design outside these lines—like text or a key part of a logo—is at risk of getting distorted, chopped off, or completely lost in the heel turn during production.
Think of it this way: a sock isn’t a flat piece of paper. It’s a 3D object that stretches and wraps around a real foot. The template is engineered specifically to account for all that stretching and curving.
This kind of precision is a big part of what’s fueling the massive growth in personalized apparel. The global socks market is projected to jump from $48.04 billion to a whopping $83.26 billion by 2033, and that boom is driven by digital tools that make custom design easier for everyone. Using your manufacturer’s template correctly is your ticket to getting a truly professional result in this thriving market.
Bringing Your Sock Pattern to Life
This is where the real fun begins. You’ve got your concept, you’ve got your tools, and now it’s time to bring them together into a design that actually works on a sock. This part of the process is less about brainstorming big ideas and more about careful, deliberate execution. You’re translating that brilliant idea in your head onto the very specific canvas of a sock template.
The first hurdle to clear—and it’s a big one—is creating a seamless repeating pattern. Think about it: a sock is basically a fabric tube. Your design needs to wrap around it perfectly, with no awkward breaks or visible seams. If you’re making a polka dot sock, for instance, the dots on the left edge of your flat design have to line up flawlessly with the dots on the right. If they don’t, you’ll end up with a jarring, ugly vertical line running straight down the side of the sock.
Working with the Sock Template
Your manufacturer’s template isn’t just a suggestion; it’s your roadmap. It’s usually broken down into distinct zones—the cuff, leg, heel, and toe—and you have to treat each one a bit differently.
The Cuff: This is prime real estate for a simple logo or a clean, solid band of color. Keep it simple here. The cuff stretches a lot when worn, and complex designs will just get warped.
The Leg: This is your main stage. It’s where your primary pattern will shine and where you’ll focus most of your energy on creating that perfect seamless repeat.
The Heel & Toe: Honestly, it’s almost always best to leave these areas as solid colors. Because of the sharp curves and the way the sock is constructed, intricate patterns tend to get distorted into an unrecognizable mess.
Imagine you’ve drawn a stunning, detailed cityscape. It looks incredible on the main leg of the sock. But if you try to wrap a tiny skyscraper around the heel, it’s going to look less like a building and more like a melted crayon. Knowing when to simplify is a mark of a pro. You can get a peek into how we navigate these choices by reading what happens behind the sock design.
If you’ve ever tried sewing, you know how a 2D piece of fabric becomes a 3D garment. It’s a similar logic here, and understanding sewing patterns can give you a great foundational understanding of how flat designs translate to wearable forms.
This visual shows the basic workflow from digital file to final output when designing your own socks.
The key takeaway here is the linear path: start with the right tools, create a solid file, and prep it properly for production.
Balancing Color and Print Quality
Color is another huge factor. That electric blue that looks so vibrant on your backlit computer screen might look dull or completely different when it’s rendered in thread. A good practice is to stick to a focused color palette. This is especially true for knit-in designs, where you’re limited by the number of physical thread colors you can use.
And please, pay attention to your file’s resolution. Nothing screams “amateur” like a blurry, pixelated graphic. As a rule of thumb, always create your artwork at 300 DPI (dots per inch). That’s the industry standard for ensuring everything prints sharp and crisp.
Pro Tip: For knit-in socks, think bold. Simplify your graphics into distinct shapes and strong lines, as tiny details get lost in the weave. With 360° printed socks, you have more creative freedom for detail, but a high-resolution file is absolutely non-negotiable.
This kind of attention to detail is exactly what drives the women’s socks market, a segment where design and personalization are everything. Currently valued at USD 12.5 billion, this market is expected to skyrocket to USD 22.8 billion by 2033. This incredible growth is proof that people don’t just want functional socks; they want wearable art and a form of self-expression.
By focusing on these practical details—seamless repeats, smart template use, and technical quality—you’ll move beyond just making a pretty picture. You’ll be on your way to crafting a genuinely fantastic sock.
Bringing Your Design to Life With Professional Mockups
Alright, your design is locked in. The patterns are perfect, your colors are finalized, and you’re feeling good. But before you send it off for production, there’s one critical step that bridges the gap between your flat design file and an actual, three-dimensional sock.
This is where creating a killer mockup separates the amateurs from the pros. It all starts with exporting your artwork correctly.
First things first: your manufacturer will give you specific file requirements. Follow them to the letter. This isn’t the time to get creative. They’ll tell you exactly what file format they need—PDF, AI, or PSD are the most common—along with the right color mode (CMYK for print, RGB for screen) and resolution (300 DPI is the industry standard).
Getting this part right is your insurance against production nightmares like washed-out colors or fuzzy logos. Think of it as the final technical handoff to the production team. You want it to be clean and seamless.
See It Before You Make It: Visualizing With Mockups
Now for the fun part. A mockup is a realistic preview that shows you exactly how your design will look on an actual sock. This is your single most powerful tool for quality control. It’s one thing to see a pattern laid out flat on a template; it’s another thing entirely to see how it curves around a heel or stretches across the cuff.
If you’re comfortable with design software, using a Photoshop mockup template is a fantastic option. These are typically PSD files with smart layers that let you just drop your design in. The template automatically warps and adds texture to make it look like a real sock. It’s magic.
Don’t have Photoshop? No problem. There are plenty of online mockup generators that can do the trick. You just upload your flat design, and the tool creates a realistic preview for you.
Why This Matters: A mockup isn’t just for your own peace of mind. It’s what you’ll use to get approval from your team, show stakeholders your vision, or even create compelling product photos for your online store before the socks are even made. It makes your idea real.
How to Make Your Mockups Look Amazing
A great mockup doesn’t just show the design; it sells it. You’ve poured hours into getting the artwork just right, so don’t let the final presentation fall flat.
Here’s how to make your mockups shine:
Show Every Angle: Don’t just show one side. Give a full 360-degree view if you can. A side view is standard, but you’ll want to show the front and back to give a complete picture of how the design wraps.
Give It Some Context: Instead of a sock floating in a white void, place it in a scene that tells a story. If it’s an athletic sock, maybe show it on a background with a basketball court texture. For a classy dress sock, a subtle wood grain background can add a touch of sophistication.
Zoom In on the Details: Use callouts or close-up shots to highlight the best parts of your design. Is there a crisp logo on the cuff? An intricate pattern on the foot? Show it off!
Creating a polished mockup is the final step in designing your own socks. It’s your last chance to catch any mistakes and your first chance to see all your hard work come to life. Nail this stage, and you’ll guarantee that the sock you get is the exact sock you envisioned.
Common Questions We Hear About Sock Design
Even with the perfect design plan, questions always come up. It’s totally normal to hit a snag and need a quick answer before you can move forward with your masterpiece. We get it.
This section covers the most common questions we hear from people who are designing your own socks for the first time. Getting these details ironed out early on can be the difference between a good pair of socks and a great one.
What Is the Best File Type for My Design?
This is, without a doubt, the most frequent technical question we field. For the absolute best quality, vector files are the gold standard. We’re talking about formats like Adobe Illustrator (AI), EPS, or a high-resolution PDF. Why? Because they can be scaled up or down to any size without losing a drop of sharpness.
Now, if your design is a photograph or a super complex illustration with tons of colors and gradients (which is common for 360° printed socks), a high-res raster file like a PNG or PSD will do the trick. Just make sure it’s saved at a minimum of 300 DPI. Anything less, and you risk a blurry, pixelated final product. Nobody wants that.
Key Takeaway: When in doubt, send a vector file. It gives us the most flexibility to make sure your design looks crisp and clean, whether it’s woven directly into a knit sock or printed onto the fabric.
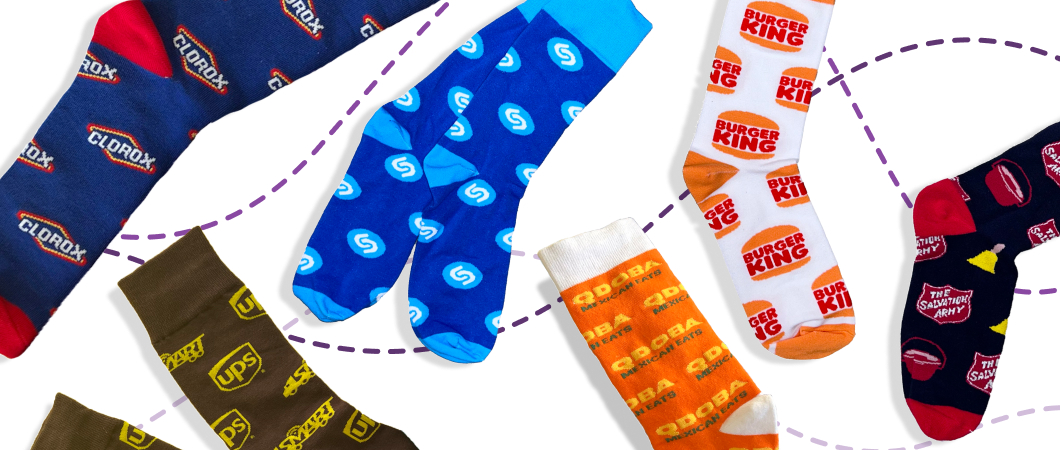
Knit-In vs. Printed Socks: Which Should I Choose?
The choice between a knit-in (or woven) design and a printed one comes down to one thing: the complexity of your art.
Here’s the breakdown:
Knit-In Designs: These are your best bet for logos, text, and patterns with a limited number of solid colors—usually up to 6 colors. The design is literally woven into the sock’s fabric, giving it a classic, textured feel that will never fade, peel, or crack.
360° Printed Designs: This method is built for the wild stuff—artwork that demands unlimited colors, photorealistic images, or intricate gradients. If you want to put a picture of your cat or a detailed landscape painting on a sock, printing is the only way to go.
Think of it this way: knit-in is like embroidery, built to last with a premium feel. Printing is like using a high-tech, super-precise inkjet printer that can capture every last detail. For a deeper dive, check out some of our other frequently asked sock questions where we get into the nitty-gritty of production.
Can I Actually Make Money Selling My Own Sock Designs?
Absolutely. We see it all the time. Many designers start creating socks just for fun or for a specific event and then realize they’ve struck gold—there’s a real market for their unique style.
But moving from a creative idea to a business venture can feel daunting. A great place to start is with a model like print-on-demand, which lets you sell your apparel without having to buy and hold a bunch of inventory. If that sounds interesting, it’s worth exploring profitable print on demand niches, where custom socks are a surprisingly popular and fast-growing category. It frees you up to focus on what you love: creating killer designs.
Ready to bring your idea to life? The team at Custom Sock Shop is here to make it easy and fun. We offer low minimums, quick turnarounds, and free design help from our in-house experts. Let’s create something awesome together.